

Let us extend the codes written in previous post. Here I will create a new directory called Models. In the Models directory, I will create a simple model called User in order to explain why I use SQLAlchemy over Flask-SQLAlchemy in upcoming projects. Here in addition to the previous post, I installed python-dotenv using:
pip install python-dotenv
Directory Structure
no_to_flask_sqlalchemy
├── Project
│   ├── .env
│   ├── Models
│   │   ├── __init__.py
│   │   └── user.py
│   ├── __init__.py
│   └── main.py
├── app.py
└── requirements.txt
Project Setup
Here .flask_env file is used to store environment variables. An example of .flask_env is given below:
# root is username and m*** is password
SQLALCHEMY_DATABASE_URI='mysql+pymysql://root:m***@127.0.0.1/db_flask_tut'
Here I am not interested to demonstrate how can we do the configuration from the different files or objects. So I am keeping everything simple.
Create Database
While creating the database I really want to introduce a nice software called Beekeeper Studio. It is an open-source cross-platform SQL editor and database which support all major RDBMS. Install this software. The installation process is very simple and straight forward so I don't want to go through that. After opening Beekeeper Studio you have to choose the connection type. I choose MySQL since I am connecting to the MySQL database. It will immediately open the next screen:
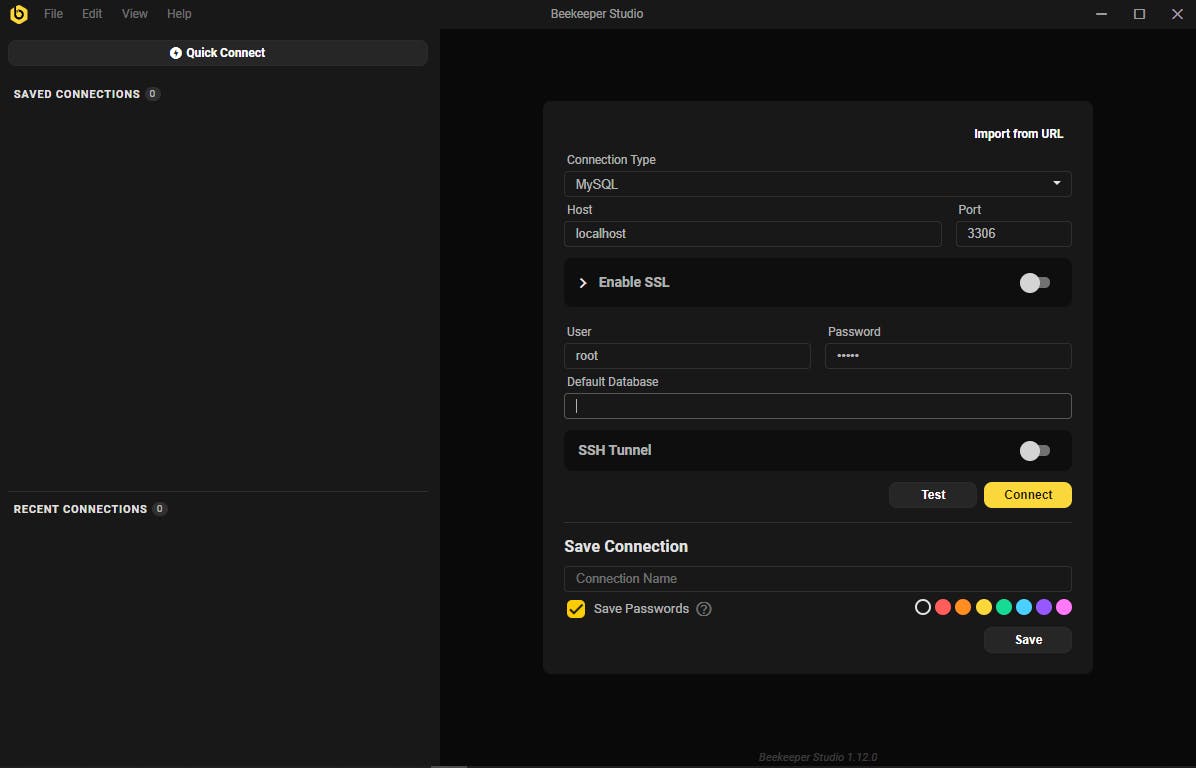
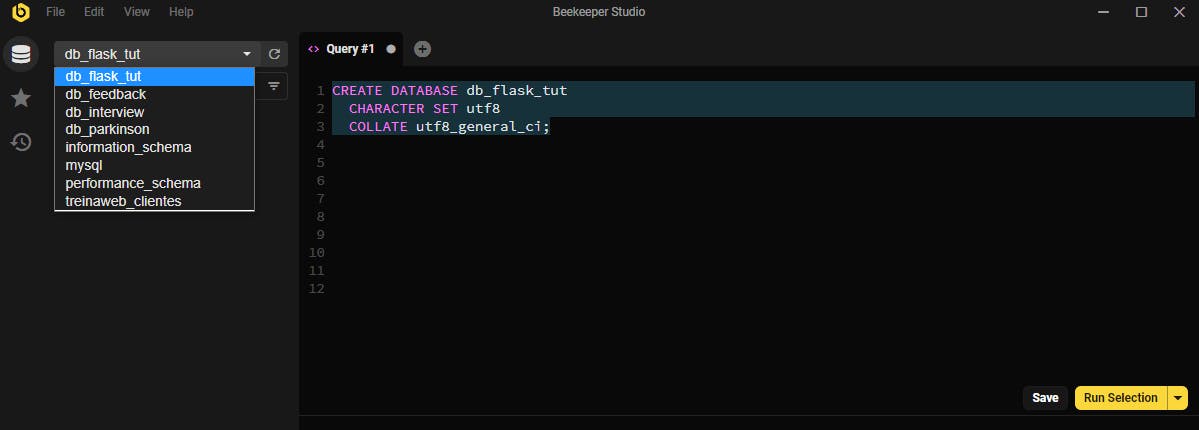
Here you have to change Host, Port, Username, Password according to your MySQL configuration. The Beekeeper Studio can connect to remote as well as native local machines. On a successful connection, you will see the following interface where you can type queries. In order to create a database:
CREATE DATABASE db_flask_tut
  CHARACTER SET utf8
  COLLATE utf8_general_ci;
run this query.

By default, Beekeeper studio is selected as the Database on the left pane. So you don't have to choose it again. Then click on the little refresh button on the left side and choose our new database called db_flask_tut.
Project/init.py
from flask import Flask
from flask_sqlalchemy import SQLAlchemy
from flask_migrate import Migrate
from dotenv import load_dotenv
import os

load_dotenv()

db = SQLAlchemy()
migrate = Migrate()

def create_app():
    app = Flask(__name__)
    app.config['SQLALCHEMY_DATABASE_URI'] = os.getenv('DATABASE_URI')
    app.config['SQLALCHEMY_TRACK_MODIFICATIONS'] = False
    # Initialize app
    db.init_app(app)
    migrate.init_app(app, db)
    # app configurations
    from . import main
    app.register_blueprint(main.main_bp)
    return app
Here we are using Flask-SQLAlchemy as ORM and Flask-Migrate for database migration.
Project/main.py
from flask import Blueprint
from .Models import User

main_bp = Blueprint("main_blueprint", __name__)

@main_bp.get('/')
def index():
    return {
        "msg": "Hello World"
    }
Project/Models/user.py
from Project import db

class User(db.Model):
    id = db.Column(db.Integer, primary_key=True, index=True)
    username = db.Column(db.String(20), nullable=False)
    email = db.Column(db.String(120), nullable=False)
    hashed_password = db.Column(db.String(200), nullable=False)
Project/Models/init.py
from .user import User
app.py
from Project import create_app

app = create_app()

if __name__ == "__main__":
    app.run()
Database Migration
- Initialize alembic migration using:
$ flask db init
It will create a migration folder in the directory in order to control versions.
- Give a migration message in order to identify what you are done (it acts as git commit command):
$ flask db migrate -m "created user table"
Go to the migrations directory and open the versions directory and find out what happened there 🧐.
It will create a new table in your database called alembic_version which contains the version of the last commit.
- Upgrade commit in order to reflect changes on your database:
$ flask db migrate -m "added new user table"
If it didn't throw any error, it is time to check our database.
Using the show tables query we can verify the user and alembic table created successfully on our database.
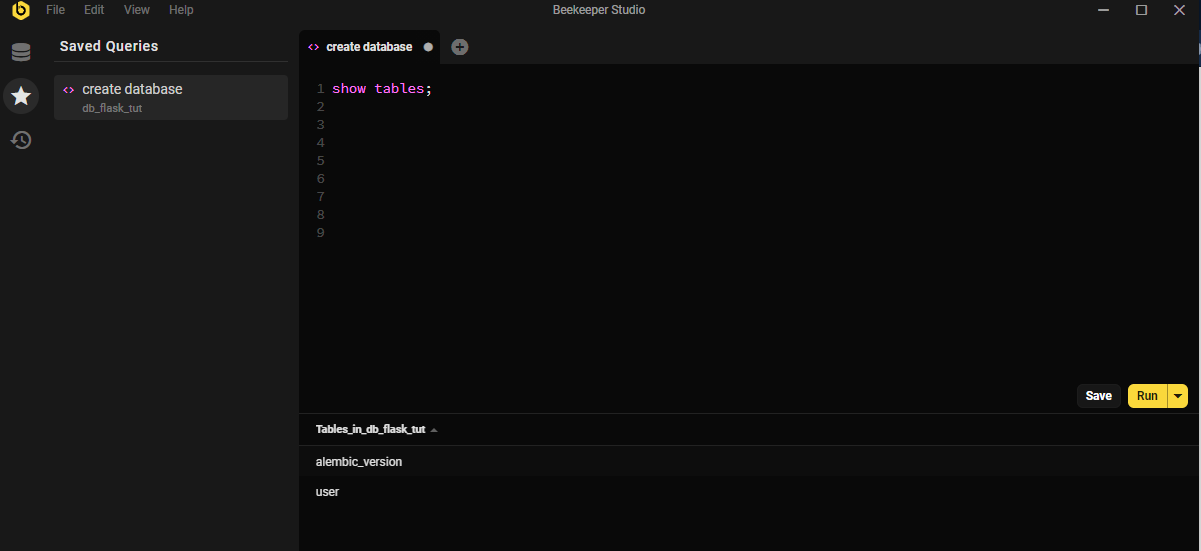
Beautiful... it successfully created the tables on the database 🎉.
Before ending this article I have to show what is the problem with flask-sqlalchemy.
Problems With Flask-SQLAlchemy
- Consider I have to create a new entry on the database from the terminal I have to go for:
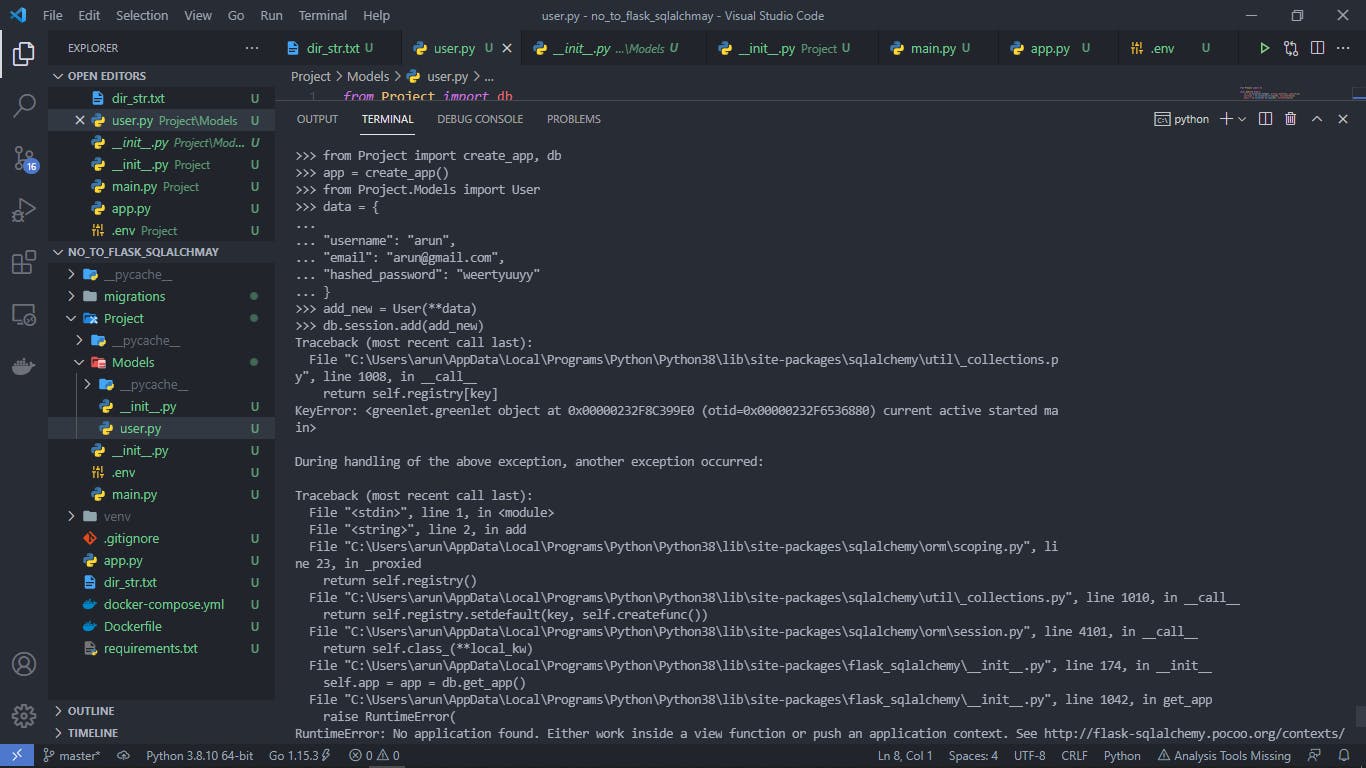
Here run time error
RuntimeError: No application found. Either work inside a view function or push an application context. See http://flask-sqlalchemy.pocoo.org/contexts/
says we cannot do the database operations outside the flask application context. Is it really a big problem? Nope, we can solve the issue in the following way:
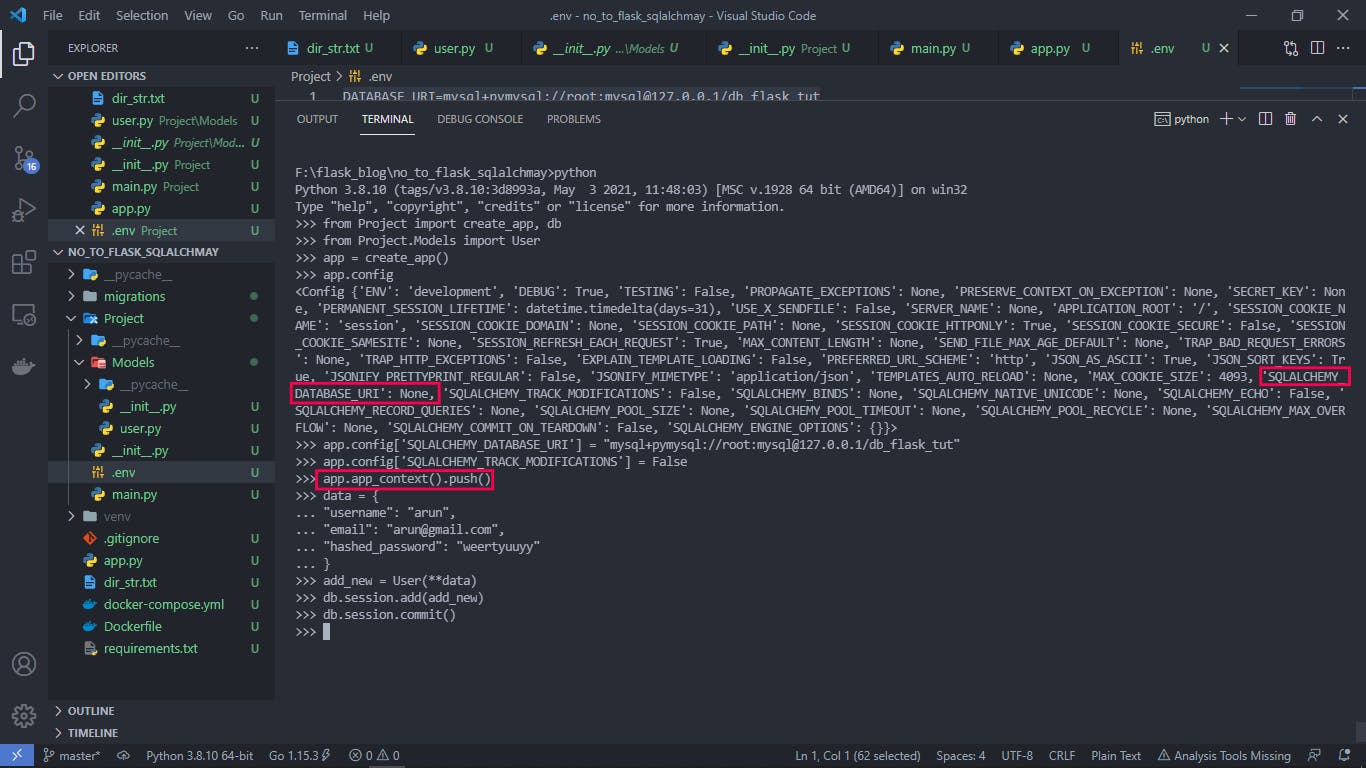
Here unfortunately we can see SQLAlchemy_DATABASE_URI is None and hence I wrote app.config['SQLAlchemy_DATABASE_URI'] again. Additionally, we givenapp.app_context().push()in order to push an application context. Now we solved the problem and we can insert the data into ouruser` table 🎉.
But here the haunting problem is what if I have to handle data from another application outside the context of the Flask application. Can I still use flask-sqlalchemy models? See these GitHub issues #250 and #269. I believe then Flask-SQLAlchemy won't help us.
As per the article written by Edward Krueger
Flask-SQLAlchemy’s purpose is to handle the return of connections to prevent issues with worker threading. These issues arise when an app user switches from one route to another.
Also as per flask documentation, we can use SQLAlchemy instead FLASK-SQLAlchemy. How to integrate SQLAlchemy with Flask is given in this documentation very clearly with examples. So I don't want to discuss this further here. I will discuss how can we do alembicm (since we cannot use flask-migrate here) migration on if we are using SQLAlchemy instead Flask-SQLAlchemy.